Ceramic mold development is the bridge between your design sketch and a production-ready tableware line. Whether you are launching a private-label dinnerware collection or adding a signature piece to your hospitality brand, understanding the mold development process helps you set realistic budgets, avoid costly revisions, and hit your launch timeline.
Most buyers underestimate two things: the number of sample iterations required before a mold is approved, and the hidden costs that surface after the initial quote. This article walks you through the full process from first contact to mass production, including a mold-type decision table, a sample evaluation checklist, and a realistic timeline you can use to plan your next collection.
When Custom Mold Development Makes Sense for Your Line
Not every custom design justifies the cost of a new mold. If your concept matches an existing shape in your supplier’s catalog, you can often achieve the look you want through decoration techniques like decal printing, screen printing, or reactive glaze without paying for mold fabrication.
Custom mold development becomes worthwhile when:
- You need a unique silhouette, rim profile, or foot design that no existing mold produces
- Your order volume justifies the upfront mold investment (typically 3,000+ units over the product lifecycle)
- You are building a proprietary product line where shape itself is part of the brand identity
- You require precise dimensional consistency across multiple production batches
For smaller test orders or seasonal limited editions, ask your supplier about borrowing or adapting an existing mold. This can cut your upfront cost by 80 percent and shorten your first sample lead time from weeks to days.
The Mold Development Process: From Sketch to Production Mold
The process follows a predictable sequence, though timelines vary by complexity. Here is what to expect at each stage:
Stage 1: Technical Drawing and Dimensional Confirmation (3-5 Days)
You submit your design reference — sketches, 3D renders, or physical samples. The factory’s mold engineer converts this into a technical drawing with precise dimensions, wall thickness, draft angles, and shrinkage compensation. Review this drawing carefully. Once the mold is cut, dimensional changes become expensive.
Stage 2: Mold Fabrication (7-14 Days)
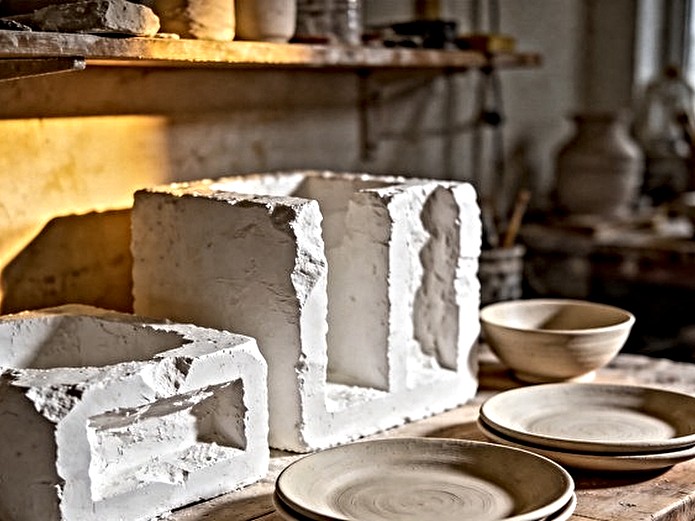
The factory carves or casts the master mold based on the approved drawing. Plaster molds are hand-sculpted or CNC-machined. Resin and metal molds require additional machining time. During this stage, the factory will also fabricate any necessary auxiliary molds for handles, lids, or complex geometries.
Stage 3: First Sample Production (3-5 Days)
The factory produces the first sample using the new mold. This sample is your first physical proof of the design. Expect imperfections — slight dimensional drift, glaze pooling, or rim irregularities are normal at this stage. The purpose of the first sample is to validate the overall form, not perfection.
Stage 4: Sample Revision and Re-Sampling (5-20 Days)
Based on your feedback, the factory adjusts the mold and produces revised samples. Most projects require 2-4 revision cycles. Each cycle takes 3-5 days for plaster molds and 5-7 days for metal molds. Build this time into your launch schedule.
Stage 5: Mold Approval and Production Readiness (1-2 Days)
Once you approve the final sample, the factory finalizes the production mold and prepares it for the kiln line. At this point, the mold is ready for your first bulk order. Keep one approved sample on file as your production standard.
Mold Types and Materials: A Procurement Decision Table
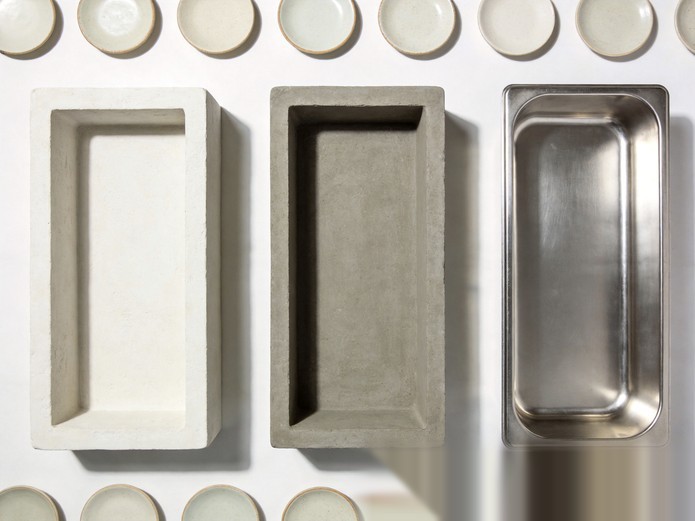
Choosing the right mold material affects your unit cost, production speed, and product consistency. Here is a practical comparison:
| Mold Type | Upfront Cost | Expected Lifespan | Best For | Typical MOQ Impact |
|---|---|---|---|---|
| Plaster (Gypsum) | $150 – $400 per mold | 80 – 150 casts | Sampling, small batches, complex shapes | Higher per-unit cost; suited for 500+ units |
| Resin (Epoxy) | $400 – $900 per mold | 500 – 1,000 casts | Mid-volume production, moderate detail | Balanced; suited for 2,000+ units |
| Metal (Aluminum) | $800 – $2,500 per mold | 3,000 – 8,000+ casts | High-volume mass production | Lowest per-unit cost; suited for 5,000+ units |
Cost-quality trade-off: Plaster molds cost the least upfront but wear out quickly, which raises your per-unit cost above what resin or metal molds would deliver at volume. Metal molds require the highest initial investment but amortize across thousands of units. If you are testing market response with a first order under 1,000 pieces, start with plaster. If you already have confirmed demand for 5,000+ units, metal molds pay for themselves within the first production run.
Lead time trade-off: Plaster molds can be ready in 7-10 days. Resin molds take 10-14 days. Metal molds require 14-21 days due to CNC machining. Factor this into your collection launch timeline, especially if you are targeting a seasonal market window.
Sample Evaluation: What to Check Before You Approve
Never approve a sample based on appearance alone. Use this checklist to evaluate every sample before giving the factory a green light:
Ceramic Mold Development Sample Evaluation Checklist
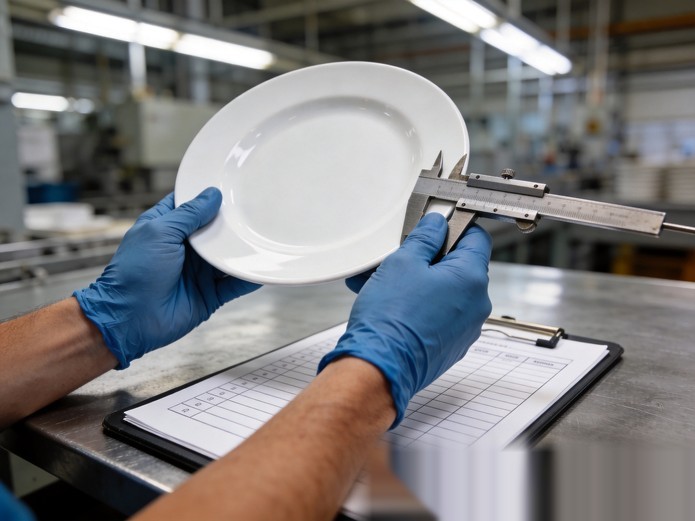
- Dimensional accuracy: Measure key dimensions (diameter, height, rim width) with calipers. Allowable tolerance is typically ±2 mm for handmade ceramics and ±1 mm for machine-pressed items. [INTERNAL DATA REQUIRED: Your supplier’s stated tolerance]
- Wall thickness consistency: Check at least three points (base, wall, rim). Variation over 1 mm can cause thermal shock failure in commercial dishwashers.
- Weight consistency: Weigh 3-5 sample units. Weight variation over 5 percent indicates uneven clay density or wall thickness.
- Foot ring stability: Place the piece on a flat surface and check for wobble. A unstable foot ring is a common cause of breakage in restaurant service.
- Rim strength: Apply light pressure to the rim. Chips or cracks under moderate pressure indicate insufficient rim thickness or glaze stress.
- Glaze coverage: Inspect for bare spots, pinholes, or orange peel texture. Check the foot ring area — glaze should not pool there.
- Color consistency: Compare the sample against your color reference under natural daylight and under warm indoor lighting.
- Handle or attachment strength (if applicable): For mugs, teapots, or lidded items, test handle attachment with a gentle pull test.
- Stacking fit: Stack 5-10 units. They should nest cleanly without sticking or excessive gap.
- Dishwasher thermal shock test: Run the sample through 10 commercial dishwasher cycles. Check for crazing, glaze cracks, or rim chips. [VERIFY BEFORE PUBLISHING: Confirm test protocol with your supplier]
- Food contact surface: Verify the interior surface is fully glazed and smooth. Unglazed interior surfaces are not food-safe for wet or acidic foods.
- Labeling and marking area: Confirm the bottom has adequate flat space for your logo stamp or decal application.
Request 3-5 sample units for evaluation, not just one. A single sample can be an outlier. Multiple units reveal whether the mold produces consistent results.
Three Mistakes That Add Weeks to Your Mold Timeline
After reviewing dozens of mold development projects, we see the same delays caused by the same preventable errors:
Mistake 1: Approving a Sample Without Testing Under Actual Service Conditions
A sample that looks perfect on a desk may fail in a commercial dishwasher or crack when stacked in a restaurant rack. Always test samples in the actual environment where they will be used. For hospitality clients, this means dishwasher cycles, stacking tests, and daily handling. For retail clients, test drop resistance and packaging fit.
Mistake 2: Not Budgeting for Mold Revision Cycles
First-time buyers often assume one sample round is enough. In reality, 2-4 revision cycles are typical. Each revision may carry a fee of $50-$200 depending on mold complexity and supplier policy. Budget for at least two revision cycles in your initial cost estimate. If your project finishes in one round, treat the unused budget as a contingency win.
Mistake 3: Choosing the Cheapest Mold Material to Save Upfront Cost
A plaster mold saves $500-$2,000 upfront compared to metal. But if your order volume exceeds 2,000 units, the per-unit cost penalty of frequent mold replacement outweighs the initial savings. Calculate your total cost of ownership — mold cost plus per-unit cost across your expected volume — before deciding. A metal mold that costs $1,500 but lasts 5,000 casts delivers a lower total cost than three plaster molds at $300 each.
Production Lead Time and What Affects It
From the day you submit your design to the day the mold is ready for production, expect 3-6 weeks for plaster molds and 5-8 weeks for metal molds. Here is a realistic breakdown:
| Stage | Plaster Mold | Resin Mold | Metal Mold |
|---|---|---|---|
| Technical drawing approval | 3-5 days | 3-5 days | 3-5 days |
| Mold fabrication | 7-10 days | 10-14 days | 14-21 days |
| First sample | 3-5 days | 3-5 days | 3-5 days |
| Revision cycles (2-4x) | 6-20 days | 10-28 days | 10-28 days |
| Final approval + prep | 1-2 days | 1-2 days | 1-2 days |
| Total typical range | 20-42 days | 27-54 days | 31-61 days |
Factors that extend lead time include complex multi-part molds (like teapots with lids), custom glaze development running in parallel, and Chinese New Year factory closures (typically 2-3 weeks in January or February). Plan your project start date at least 8 weeks before your desired production launch.
Cost Structure and Hidden Expenses to Budget For
The mold itself is only one line item. Here is a realistic cost breakdown for a mid-complexity dinner plate mold:
- Mold fabrication: $300 – $2,000 (varies by material and complexity)
- Sample production (per round): $30 – $80 per unit for 3-5 units
- Mold revision (per cycle): $50 – $200
- Technical drawing and CAD: Often included; $100 – $300 if outsourced separately
- Shipping samples to you: $40 – $120 (DHL/FedEx from China)
- Custom glaze matching (if needed): $200 – $500 for color development
- Quality inspection of first production batch: $150 – $400 for third-party inspection [INTERNAL DATA REQUIRED]
Total upfront investment for a typical custom plate mold project ranges from $800 to $3,500 before you place your first bulk order. This is why confirming market demand before starting mold development is critical. If you are unsure about demand, consider a small pilot order using an existing mold shape with custom decoration to test the market before committing to full mold development.
Three actionable recommendations for your next mold project:
- Request 3-5 sample units before mold approval — not one. Multiple units reveal consistency issues that a single perfect sample can hide.
- Build 2-4 weeks of revision time into your launch schedule — even if you hope to finish faster. Delays are more costly than padded timelines.
- Test samples under actual service conditions — dishwasher cycles, stacking, daily handling — before you approve the mold for production.
Ready to move from concept to production? Submit your design for a feasibility review and we will assess mold complexity, estimate timeline, and recommend the right mold material for your volume and budget.
Frequently Asked Questions
How many samples should I request before approving a mold?
Request 3-5 units per sample round. A single sample can be an outlier. Multiple units help you identify consistency issues in dimensions, weight, and glaze coverage before committing to production.
Can I reuse a mold developed for one product on a similar shape?
Generally no. Ceramic molds are shape-specific. Even small changes to rim profile, wall angle, or foot design require a new mold or significant modification. Minor changes may be possible with resin or metal molds, but plaster molds usually need replacement.
What happens to the mold if I stop ordering?
Mold ownership terms vary by supplier. Some factories include mold cost in the unit price and retain ownership. Others charge a separate mold fee and transfer ownership to you. Clarify this before signing any agreement. If you own the mold, ask about storage fees and shelf-life limits — plaster molds degrade over time even when unused.
Do I need separate molds for different sizes of the same design?
Yes. Each size — dinner plate, salad plate, bowl, mug — requires its own mold. A complete dinnerware set with four pieces typically needs four molds. Some factories offer volume discounts when you develop multiple molds for the same collection.
How do I protect my mold design from being used for other clients?
Include an exclusivity clause in your mold development agreement. Specify that the mold may not be used to produce goods for other buyers without your written consent. For high-investment designs, consider registering design patents in your target markets. [VERIFY BEFORE PUBLISHING: Confirm applicable IP protection strategies with legal counsel]
What is the smallest order I can place after mold approval?
Minimum order quantities vary by factory and mold type. For plaster molds, MOQs typically start at 500 units. For metal molds, MOQs may be 2,000-5,000 units to justify the mold investment. Some suppliers offer flexible first orders of 300-500 units for new clients to test market response. [INTERNAL DATA REQUIRED: Confirm with your supplier]